Thursday 15 January 2015

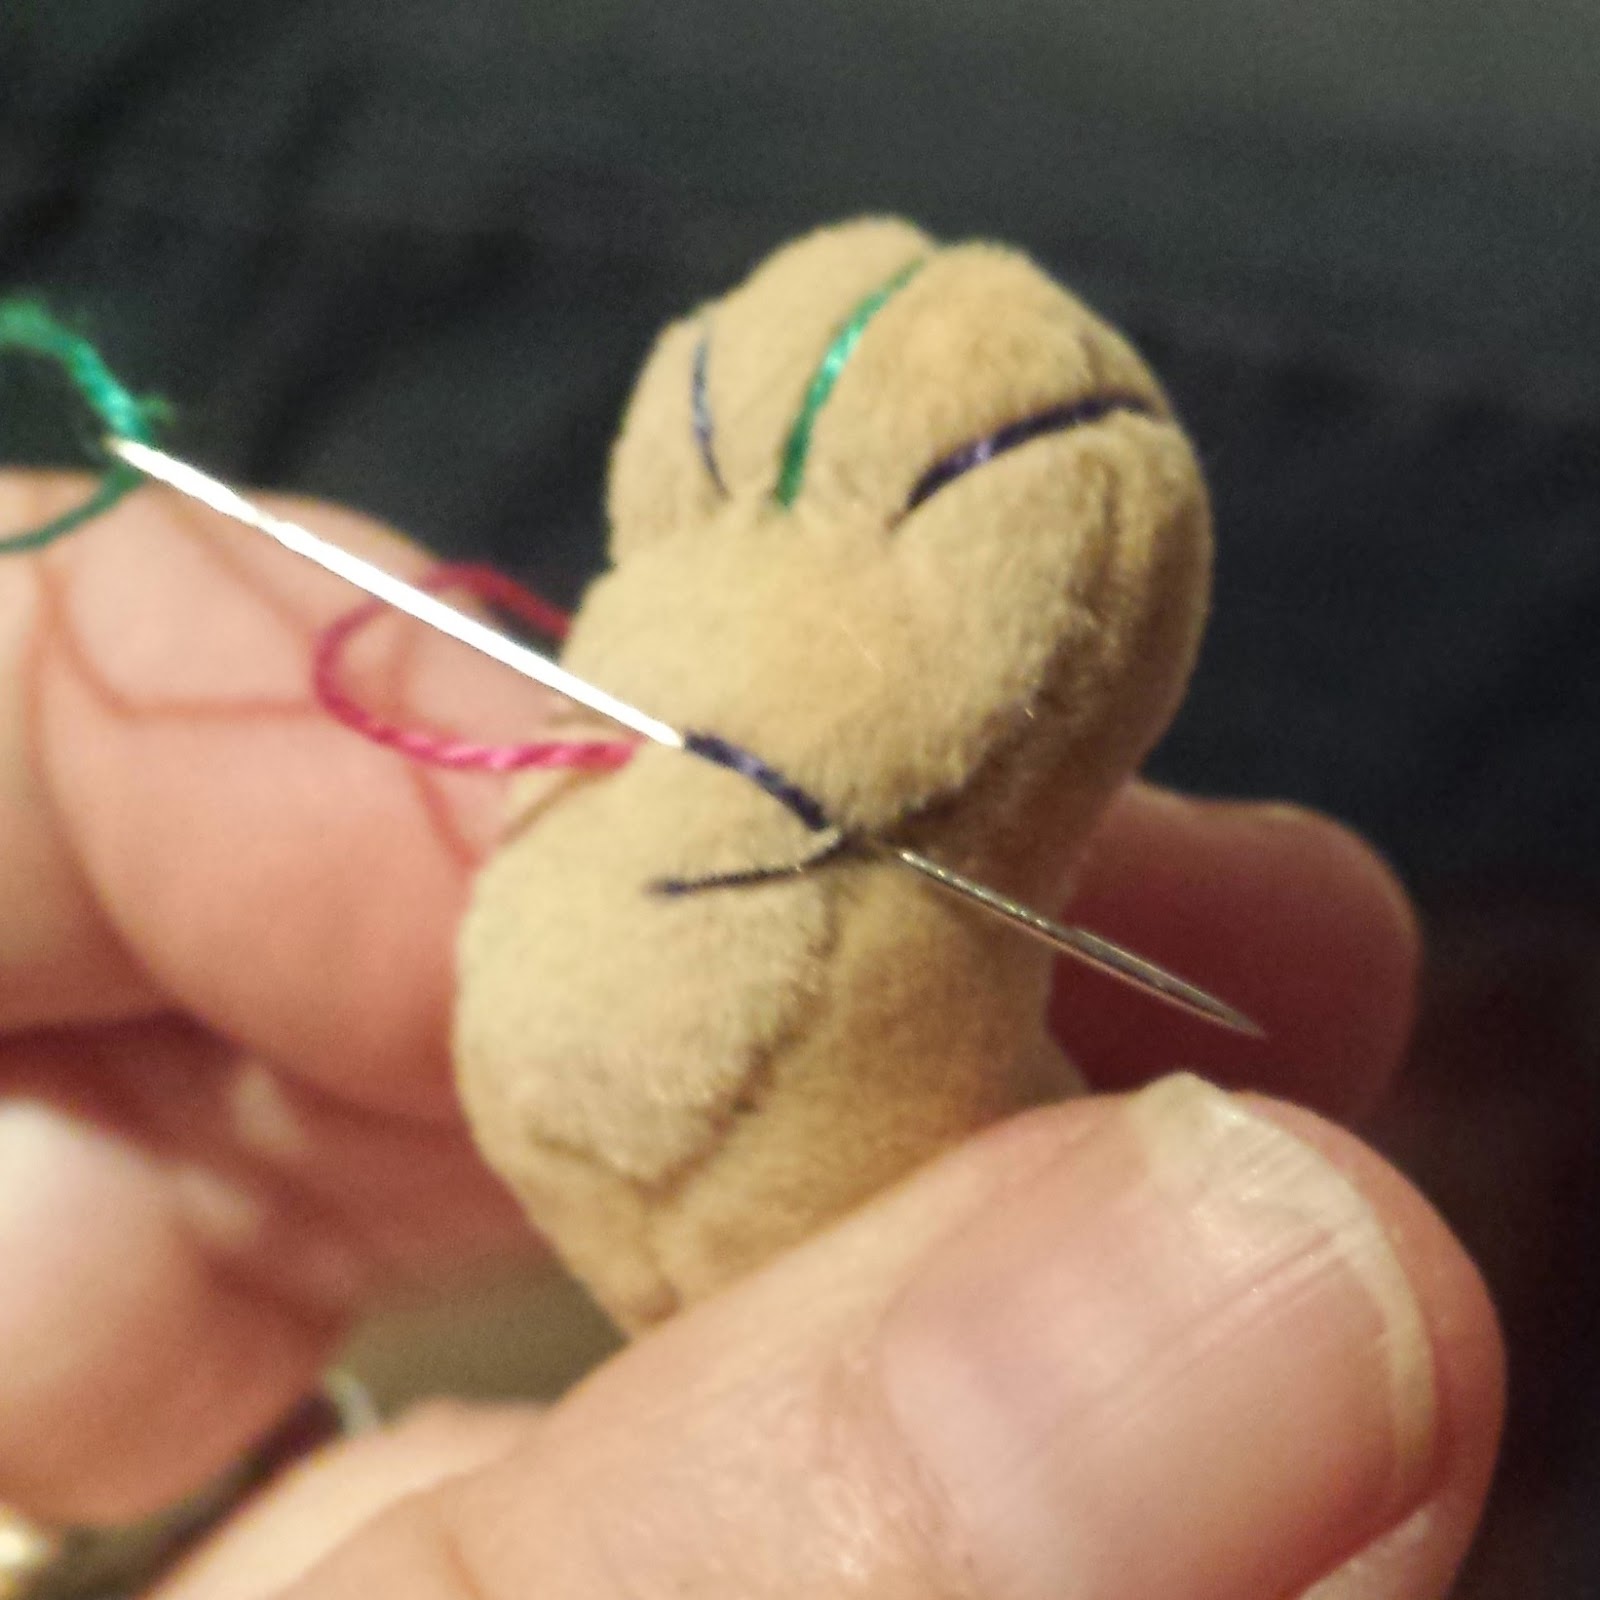
Needle sculpting paws part 2 - feet.

As with paws, we start with a needle threaded with perle thread (don't use stranded embroidery thread, it's not strong enough) and we take our 2 feet and decide which will be left and which right, in this example I'm doing the right foot.  Insert the needle half way along the instep seam, coming out at the centre front, where the the toe meets the sole.
Go back into the same point, splitting the thread to lock it, as we did with the hands, and come out in the centre of the sole, about one third of the way towards the heel.  Flex the foot as you go through it, 'scooping' a little extra stuffing with your needle, so the thread ends up going in a curve through the foot when you pull it up, this will pull a little more stuffing into the toe, creating a more cushioned effect.
Take a teeny stitch in the sole, as we did with the paws, and bring your needle out either in the seam joint where you started, which gives you simple pads on the sole only, or, as in this example, in the centre front seam of the foot, about where it starts to curve, to create a 'claw'. 
Lay the thread in position (it should sit neatly in the slight dent at the centre front) and insert your needle exactly in the tiny stitch in the centre of the sole, and bring it out in the foot/sole seam where you want the first side 'claw' to sit,
Repeat the process for the first side claw/toe, pulling just enough to create a pad on the sole, but not to ruckle the fabric.
Then do the third toe/claw in the same way.


When you are completing the thisrd one, bring your needle out in the centre front seam junction where you started.
I like to sculpt an instep, too, so the foot is properly foot shaped! If you don't want to do this, you can finish by just doing the same thread splitting stitch and taking your needle out at the heeel, where you pull slightly, snip, and the end will disappear into the foot.  If you do want to shape an instep, do the thread splitting stitch again, to lock your work in place, bringing your needle out in the same place where you first inserted it in to the foot, in the instep seam about halfway between the toes and the heel.
To sculpt the instep, put your needle back into the same point on the seam (a thread or 2 away, else it will just pop back in, it needs some threads to cling to!) and come out about 2 thirds across the sole, a little up from straight across.
Pull really firmly - not hard, you don't want to snap the thread, just sculpt the fabric & stuffing! then lay the thread over to the same point in the instep seam, put your needle in there again, and bring it out through the sole, not quite so far across, and at about 45 degrees to the upper instep stitch.
Pull through, again fairly firmly, and put your needle back into the same point of the instep seam, bringing it out 2 or 3 threads beyond the end of the first instep stitch.
Now put your needle precisely into the very end of the first instep stitch an d back out in the instep seam.
Pull firmly, and you will have a neatly shaped foot. Finish by going back into the instep seam one more time, bringing your thread out at the heel/sole junction, pulling slightly  and snipping the thread.
One right foot! Repeat mirror imaged for the left foot, and you have a full complement of limbs.

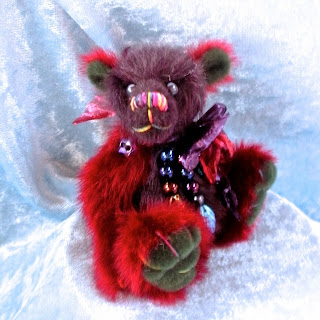
And here is my completed bear, called 'Burns Night" ready to dance a reel as the haggis is serenaded in!  I hope you have fun trying this, if you want a bear to stand firmly by itself, weighting the feet with a little steel shot, and sculpting them like this, gives it the same advantage we have - almost tripod shaped feet!


Pulling toes and paw pads. Part one

 I shall start with paws/hands, as they are simpler than feet. Having threaded your needle with perle embroidery thread, insert into the underarm seam at the wrist, and come out in the centre of the seam where the middle of the 'hand' would be, draw through till the last bit of thread just disappears into the wrist seam.

Now insert the needle through the the seam, splitting the thread(to lock the thread in place) and bring it out in the centre of the 'palm'.
Pull gently through, then insert  the needle a couple of threads away from its exit point, to one side, and take through to tht back of the 'hand' to the point you want the thread to appear I usually do it about half the distance from the seam than it is on the palm. Draw through gently.

Pull gently, to create a slight 'pad', then lay the thread over the the end of the hand, where you want it to define the paw pads, and put the needle in exactly in the point in the palm where you did the tiny stitch, exiting in the seam where you want the next division to be. Pull through firmly but not tightly - too tight and you will create rucks in the fabric.

Again, go back through the same point in the seam and out where you want the 2nd division of the palm to be - I usually do do it just a bit closer to the centre stitch than half way. Pull just enough to create a slight indentation in the seam at that point.

Again, go back through to the back of the hand from a couple of threads to one side of your exit point, and pull just enough to create a slight cushion.

Lay your thread over carefully, sitting in the slight notch in the seam line, and insert your needle in the tiny palm stitch, bringing it out again in the seam on the other side of the centre stitch where you want the next division to sit.

Repaet the process for the final pull/claw.

As you finish the last claw, bring your needle out in the paw seam at the centre, where you started, then go back into the same point, splitting the thread again to lock it, and bringing your needle out at the 'elbow', where you can pull it a little tight and snip the thread, so the end disappears.

Ta-dah! Finished paw, which should curve in slightly, ready to cuddle!

I must add, this is just the way I have worked out how to do it, i don't say this is the 'right' way to do it! It's just what I've worked out from needle sculpting dolls and doing a little bit of stump work embroidery when I was at college, if anyone has anything useful to add to my knowledge, I'm all ears!

Monday 3 February 2014

A new year, new approaches.

Well, that was certainly a frantic end to 2013! Several astoundingly successful craft fairs, and one disastrous Bear fair, leaving me with only about 20 bears at the end of the year, which is barely enough to make the stand look interesting!   Above is 'Noah', the first of my new pattern for this year, he only sits about 2 inches high, so quite pleased with how the proportions of the mohair fitted the design. Aiming for bigger, more interesting feet, and more impressive noses this year.  Have also started making some rather larger bears again, using split pin joints throughout, as my poor hands can't cope with the accuracy required with a long needle for buttons!

'Guthrie' is my largest bear in a long time, sitting about 5.5 inches tall. He's partly filled with pellets and steel shot, so he's quite a saggy, cuddly little handful!   I have draughted a pattern for one larger still, but don't yet have big enough joints for it - that's a purchase for my first bear fair of the year, on March 30th, at the Park Inn, Telford.  I have also been playing with some hand dyed mohair from Barabara Ann Bears, which is a bit more expensive, but so worth it! As well as the beautiful, mingled colours, the washing of the mohair fabric gives it such a soft 'handle' - very sensual bears!


This is 'Larch' in one of the hand dyed mohairs, I love the subtle colours, don't you? He is from the same pattern as Guthrie, and about the same size, but without the pellets. I love the zingy green backing.  I am also making a few dolls, which I will be taking to Telford on the 30th March, 'Primavera' is the first.

 They are similar to, but smaller than the dolls I made a year ago, as I found the larger size difficult to accomodate, and I think my customers may have the same problem?!

'Winter Warmer' is also partly made from one of the hand dyed mohairs, which takes a bit of the ferocity out of the red, I think. I plan to do the craft market at Cirencester on the first Saturday of each month this year - more often if Jiffy gets a job at home, but that's in the lap of fate! This will give a place where I am easy to find on a regular basis, if people feel in need of a beary cuddle! However, many of you can't get to Cirencester, and rely on seeing the bears online, so I'm looking at how best to make them available to you there. I have several ideas churning around in my head, and would appreciate your feedback on them.

While I have a website at present (www.mwmyn.com) it's not an ecommerce/shopping cart site, and I'm wondering if you would find it easier to use, if I were to make the investment in a 'click & buy' arrangement? Not everyone is comfortable with emailing and having a fairly personal engagement with me, I know. Also, my present domain name is personal rather than the name of my bears, so perhaps that makes me hard to find?  The investment could be quite expensive, so another thought might be to start another 'Orkid Bears' blog, and post each bear as they're available on there? Though you would have to scroll through quite a few posts to see them all :(  I thought about just selling through Facebook, but many of you aren't on/don't like Facebook, so that idea doesn't have any legs at all!

I really would be grateful for your thoughts on this, as it's all about you, my beary friends, at bottom, and I want you to be happy with what I do.  I hope to see some of you at Cirencester or Telford, in the meantime I wish you all a wealthy, healthy and fortunate 2014!

Friday 22 November 2013

Christmas is coming, and I'm in a flap!

I must apologise, I've been so busy making & selling, blogging came a long way down on the 'To Do' list! With so many fairs, both craft & Bear, booked for the next few weeks, and having sold nearly half the stock I took with me at the last Salisbury Guildhall fair, I've been in a minor panic! However, despite having our new puppy, Minnie, to cramp my style, I've managed 6 bears/bunnies/elephants this week, so feel a bit less pressured!


Minnie is very small & cute, but has serious separation anxiety, having always been with her mother till she came to us. She has transferred that security aspect to me, so it's like having a toddler again - i.e. I can't even go to the loo without her!  But she's been very good about not helping herself to the bears, tempted though she clearly is!

I've made quite a few buddies with Christmas in mind, but not so 'Christmassy' they'll be out of place all year round - bears need hugs all the time to to sustain them, after all! I shall be doing the Beaulieu Bear Fair on Sunday the 1st December, and there is a competition on the theme of 'Fruits of the Forest', so here is a quick preview of my entry :o)

I don't expect to get a prize, but it's always fun to work to someone else's choice of theme.  On the 30th November, I shall be at the last Sherborne Artisan fair, at the Digby Memorial Hall. This is a lovely little fair, small but always quality, both exhibitors and public - roll on next year's dates!

As you can see, much of my Christmas theme is based on red & white, subtly accessorised, which certainly isn't an exclusively winter colour combo! On the 5th of December, there's a short, Christmas fair at The Exchange in Sturminster Newton, from 5pm - 7.30pm - give my Fayre Exchange friends a last chance to grab a festive bear! Then things get a bit frantic, on the 7th we're back at Salisbury Guildhall (be nice to have good sales, but please don't clean me out!) then straight down to Brighton, for my biggest Bear Fair since returning to making bears, at Hove Town Hall - I think we'll be dishrags by Monday morning!

After Brighton, assuming I don't sell out, I only have one more fair - back to Salisbury Guildhall on the 14th, when I plan on reducing my prices to give everyone a chance at a bargain as my seasonal gift to my customers! Anything left after that will go onto the website at seriously reduced prices for my online buddies, so everyone gets a chance.

So, there's a taste of my upcoming festive friends, and a reminder of dates where you can come and have a trial hug! I'm taking the weekend off, so the hole in my finger from sewing so much can have a chance to heal, and I'll be making more next week (a blue bunny is cut out, ready to go on Monday)


Don't forget, the newest news is on Facebook https://www.facebook.com/MwmynsMakesOrkidBears?ref=hl

Monday 23 September 2013

The Illustrated Bear

I have been taking photographs of the stages of making a realistic bear, for the purposes of illustrating the instructions for its pattern - some of the processes are quite complex, and I'm not quite sure my immortal prose is up to the job! Although most of you probably haven't the remotest desire to make a bear, I thought you might, none the less, like an insight into how one of my bears comes to be. Above are all tne pieces cut out, clockwise from top left:
Body & tail, back legs & paws, front legs & paws, Neck gusset (for a double jointed neck, so it is fully poseable) and the 2 side heads, central gusset and ears for the head proper.

Here are all the pieces stitched together, giving you a rough idea of how they all fit to make a bear.  After this, they are turned right side out, and I start by stuffing the legs, and 'pulling' their toes!
Then it's the crucial bit - the head, which is firmly stuffed, especially the muzzle. You may have seen bears with very tiny noses on a rather pointed looking face, this is because the muzzle was not firmly enough stuffed, and it collapsed under the pressure of embroidery! Once stuffed, the eye sockets are needle sculpted, and eyes set in. Most bear makers use glass eyes, with a metal loop at the back, but as I see my bear making in an older tradition than commercial toy making, I prefer to use beads, such as a home toymaker would have had access to, in making a doll or other cuddly for her/his child. This is also why I prefer to use button joints for the limbs - but that's a whole other blog post!


Here is what he looks like once his eyes have been put in, and the initial head joint. Then I have to fit the neck onto the split pin at the back of his head, stuff that and fit the 2nd neck joint, so that the wedge shaped piece enables him to look down, up or sideways, according to how the neck is arranged - thickest part down, and he looks up, thinnest down and he looks down etc. Now it's time to give him a nose & smile.
I stitch the nose & mouth with the head upside down - this helps me to get it even, as we all have a dominant eye, and a tendency to see what we expect to see, and this makes the brain think twice! Once his face is complete, and I've sewn his ears on, the whole assembly can be jointed to the body. the split pin projecting from the neck gusset goes through the shoulder seam, and a fibreboard disk and metal washer are fitted over the pin. Then I use fine, long nose pliers to turn the 2 halves of the pin in opposite directions, coiled tightly against the metal washer, to make a firm, lasting swivel joint.
So. now we have a head and neck, joined to a body, which now has to be equally firmly stuffed, else the body will become very skinny when I stitch through it to make movable limbs.
If you imagine each little disc by the top of each limb is a button, this roughly shows you how button jointing works. Strong thread, and a long needle, are used to go through limbs and body, to & fro repeatedly, so the thread forms a swivel around which the limb moves. The button stops the thread pulling through the fabric, and forms a washer to help the limb move more smoothly. Obviously, if a child were to move the limb round & round in the same direction, sooner or later the thread would snap, but, mostly, children who only had home made toys were rather more careful with them than most modern children!
And here is the final result, as you can see, the neck wedge has the widest part at the bottom, so the bear is looking more or less straight ahead, as it would be while walking on all 4 legs. Obviously, this has been a whistle stop tour, it actually took me nearly 2 days to make this bear, and many more photographs were taken for the benefit of pattern users!

Hope you enjoyed this, it exhausted me to make the collection of pictures, switching from bear making brain to photographer/teacher brain, but I think it was worth it!