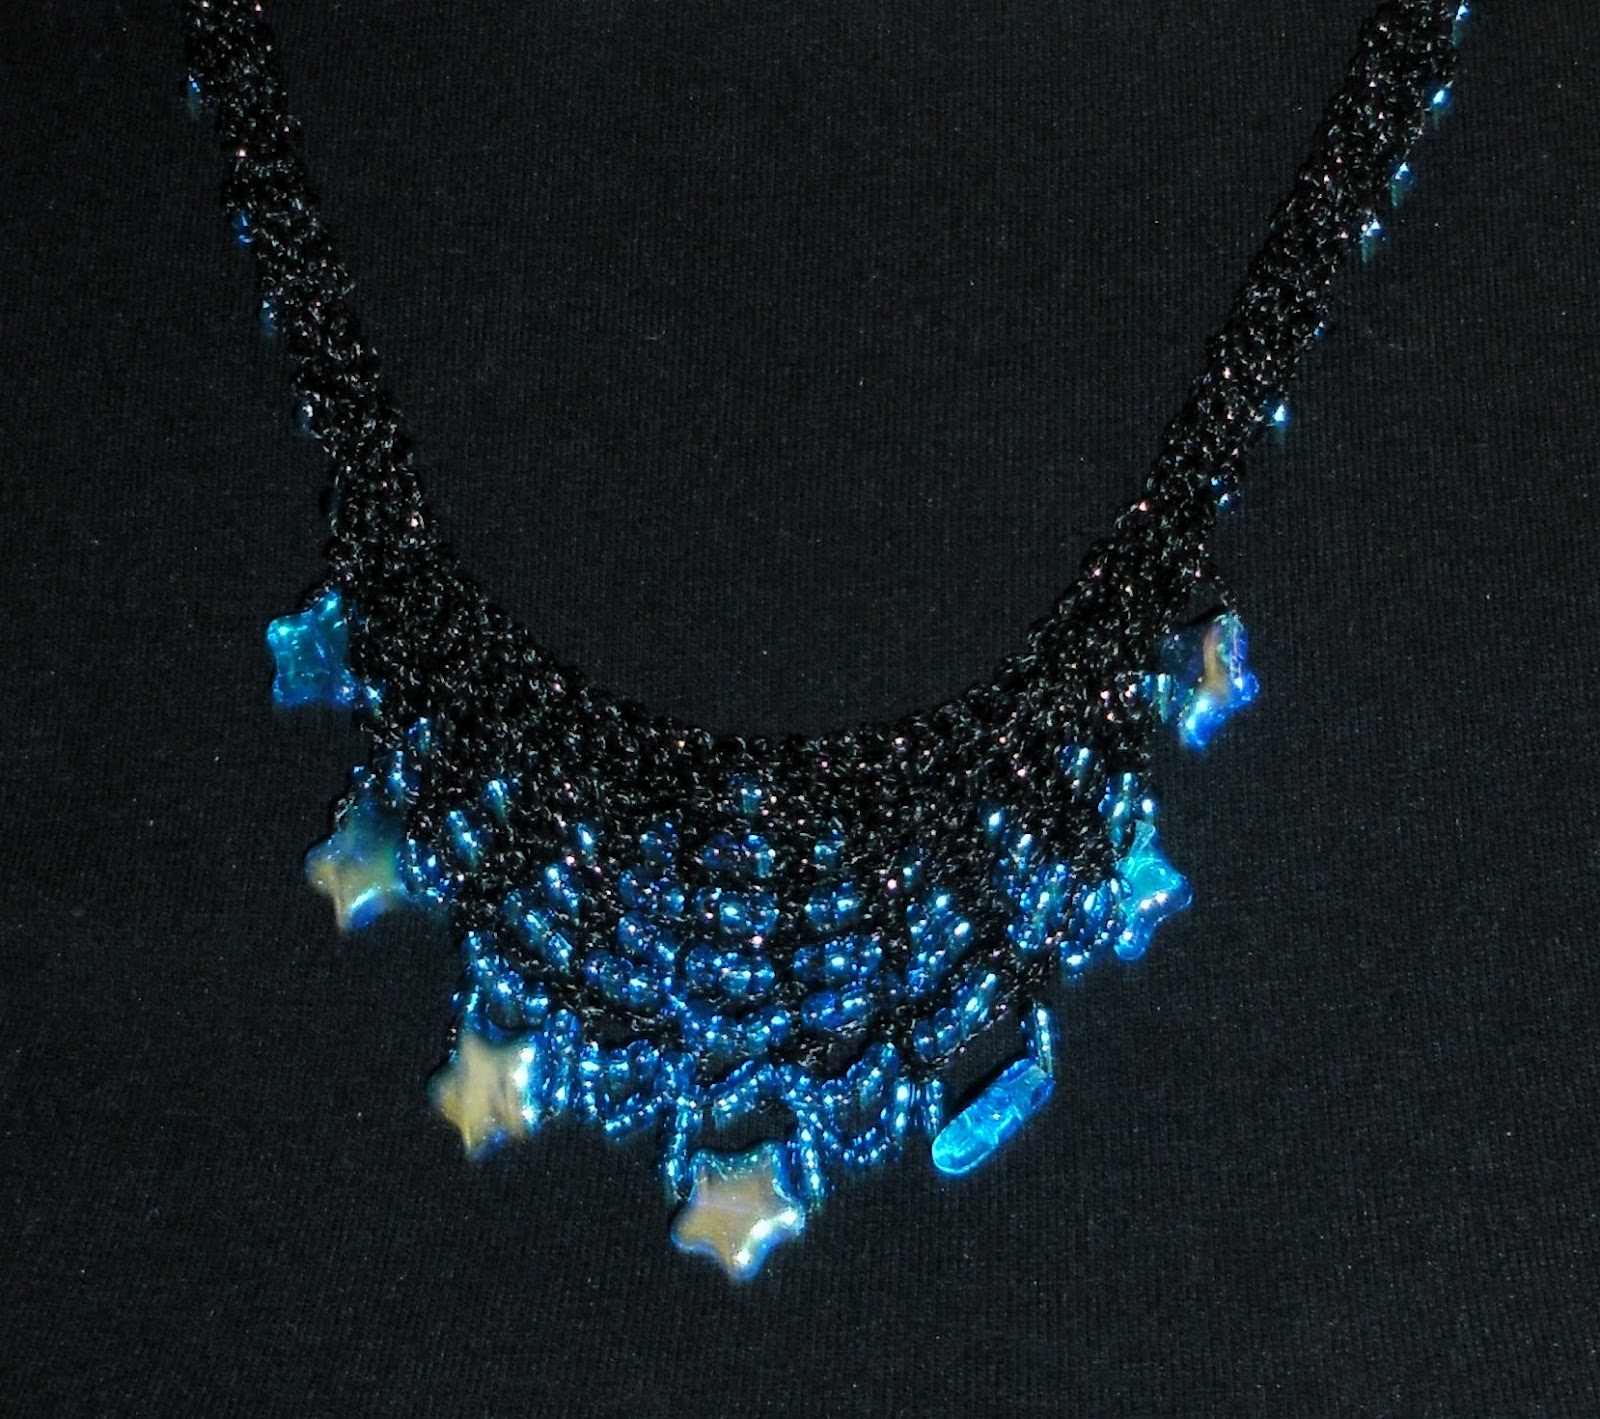
The above picture shows quite clearly how the beads are distributed, including the 20-30 beads each side of the central motif and showing how the feature beads can be included to make the lower edge more interesting.
You will need:-
1 pair 2/2.5mm needles
Ball of Goldfingering or skein of Perle embroidery thread
Quantity of small round beads (with large enough hole to thread on chosen yarn)
Optional - 7 feature beads for lower edge
Start by threading the beads on to your yarn , in reverse order to which you will knit them. ie the first bead to go on is the last one to be put on the yarn. Follow the chart, remembering to thread on 20-25 beads each side of the row of beads that form the lower edge of the necklace.
The easiest way to thread the beads on is thus:- Thread a fine sewing needle with a short doubled length of ordinary sewing thread, thread the start of the knitting yarn through the loop of the doubled thread so that it hangs down and you have a loop of knitting yarn through the loop of the sewing thread. You can now start threading the beads onto the needle, and thence onto the yarn.
1 pair 2/2.5mm needles
Ball of Goldfingering or skein of Perle embroidery thread
Quantity of small round beads (with large enough hole to thread on chosen yarn)
Optional - 7 feature beads for lower edge
Start by threading the beads on to your yarn , in reverse order to which you will knit them. ie the first bead to go on is the last one to be put on the yarn. Follow the chart, remembering to thread on 20-25 beads each side of the row of beads that form the lower edge of the necklace.
The easiest way to thread the beads on is thus:- Thread a fine sewing needle with a short doubled length of ordinary sewing thread, thread the start of the knitting yarn through the loop of the doubled thread so that it hangs down and you have a loop of knitting yarn through the loop of the sewing thread. You can now start threading the beads onto the needle, and thence onto the yarn.

Cast on by the backward loop method, this enables the beads to hang loosely between the stitches and drape properly.
Cast on 3 stitches, slide 1st bead up to needle, cast on 2 sts, slide up next bead, continue thus till you have 20 - 25 beads cast on, then cast on 2 sts between each of the groups of beads at the centre of the necklace (one,two,three, four, five, six, seven, six, five, four, three, two, one. If desired, one feature bead at the centre of each odd numbered group) Then cast on 2 sts between each as before till you have another 20 -25 beads on the second side of the centre, then cast on a further 3 sts, turn.
2nd row, knit till 3 sts beyond the last bead of the central group, wrap & turn (move yarn to front of work as if to purl, slip next stitch on to right needle, pass yarn back to other side of work, replace slipped stitch back onto left needle and turn to start working back in other direction. written as 'W&T')
Cast on 3 stitches, slide 1st bead up to needle, cast on 2 sts, slide up next bead, continue thus till you have 20 - 25 beads cast on, then cast on 2 sts between each of the groups of beads at the centre of the necklace (one,two,three, four, five, six, seven, six, five, four, three, two, one. If desired, one feature bead at the centre of each odd numbered group) Then cast on 2 sts between each as before till you have another 20 -25 beads on the second side of the centre, then cast on a further 3 sts, turn.
2nd row, knit till 3 sts beyond the last bead of the central group, wrap & turn (move yarn to front of work as if to purl, slip next stitch on to right needle, pass yarn back to other side of work, replace slipped stitch back onto left needle and turn to start working back in other direction. written as 'W&T')

3rd row, knit 5 sts, knit to end of 2nd row of chart, inserting beads as chart - you will find yourself setting in beads exactly above the previous ones. one bead less per group. When all beads have been knitted in, knit 3, W&T.
4th row, knit till 3 sts past the last bead in previous row, W&T.
5th row, W&Ting at the end of the row, continue as before from the chart till all rows of the chart are worked and you've run out of beads (assuming you counted right!)
When all beads are knitted continue to end of row, turn and knit one row, then cast off loosely.
Sew hook & eye fastenings to each end, then wash gently in hand hot water, use a little fabric conditioner in the final rinse and pat dry in a towel. Hang to dry by fastening, this helps the necklace to hang properly in wear.
4th row, knit till 3 sts past the last bead in previous row, W&T.
5th row, W&Ting at the end of the row, continue as before from the chart till all rows of the chart are worked and you've run out of beads (assuming you counted right!)
When all beads are knitted continue to end of row, turn and knit one row, then cast off loosely.
Sew hook & eye fastenings to each end, then wash gently in hand hot water, use a little fabric conditioner in the final rinse and pat dry in a towel. Hang to dry by fastening, this helps the necklace to hang properly in wear.

Hopefully, the photographs will give you an idea of how adaptable this pattern can be, it depends on your choice of yarn and beads! The last example is knitted with multicoloured perle embroidery thread, which gives quite a lot of pzazz! If you have any problems, don't hesitate to email me for help at mwmyn@yahoo.co.uk, and feel free to pass the pattern around!